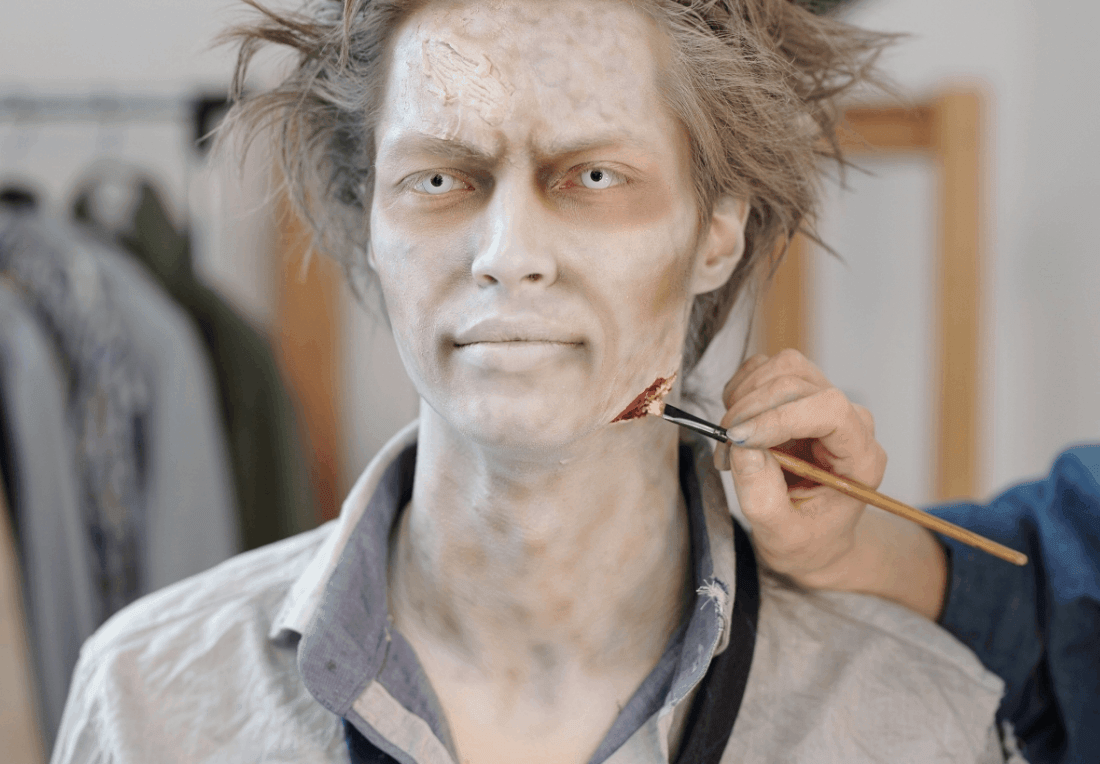
Easy zombie makeup is a DIY job: grey-green shading, sunken eyes, a few bruises and a little fake blood sitting on the surface of the skin. Special effects wounds, built-up scars and anything that sticks to your skin are the pro-only part, and a local makeup artist can bring the right products to your home or event, apply the look and explain how to take it off.
A zombie is the one monster whose bad day is the entire costume, which makes it a great look for people who’d rather not spend an hour on eyeliner. Dead is a colour palette: grey, green, bruise purple and a lot of I haven’t slept. Most zombie galleries throw easy shading and gory wounds into one pile, so you can’t tell which looks you can do before dinner and which ones need someone with a kit.
The product and removal advice here comes from makeup artists who take bookings on Blys. Nothing in this post is skin or health advice, so follow the instructions on your own products, and ask an artist if you’re unsure about one.
Zombie Makeup: Where the DIY and Pro Line Sits
Zombie makeup splits into two groups, and it helps to know which group a look falls into before you buy a single product.
The Surface Rule
If it only sits on top of the skin and wipes off, it’s a DIY job, and anything that sticks to the skin or builds up on it goes to a pro. Shading, bruises, painted cracks and surface blood sit on top, while wax wounds, latex and anything glued down are built on, and that’s the part that’s harder to apply and harder to take off. If it needs glue, it needs a pro.
| Look | What it involves | DIY or pro |
| Easy zombie makeup | Shading, powder, bruises, a little dirt | DIY |
| Zombie makeup designs | Painted cracks, veins, stencils | DIY, with patience |
| Surface fake blood | Drips and smears on top of the makeup | DIY, with care |
| Zombie makeup men | Shading around stubble or a beard | DIY, or a pro for wounds |
| SFX wounds | Built-up wounds, scars, torn skin effects | Pro |
Why One Gallery Doesn’t Work
A gallery that mixes the two is like a menu with a salad and a flaming dessert in the same row: you can’t tell which one you can handle at home. Splitting zombie looks into easy and pro-only means you choose with your eyes open, and you don’t buy a wound kit for a look you wanted to finish in twenty minutes.
Easy Zombie Makeup: The DIY Looks
Easy zombie makeup is built from shading, a pale base and a little mess, and it’s the best place to start. Here’s the routine, in order:
- Start with a clean, moisturized face and a light pale or grey-green base.
- Shade the hollows under the cheekbones, the temples and the eye sockets.
- Add a purple or blue bruise tone around the eyes and along one cheek.
- Dab on a little dirt or darker shading at the jaw and hairline.
- Finish with fake blood on the surface, last of all.
Easy Zombie Makeup: The Dead Palette
A dead palette is grey, green, a touch of yellow and bruise purple, mixed and blended so the edges disappear. Keep the base only a shade or two paler than your skin so there’s no hard line at the jaw, and blend it down the neck so your head doesn’t float. The skin tone breakdown in clown makeup ideas works the same way for a pale or grey-green zombie base. A zombie with perfect eyeliner is just a very organized zombie, so smudge everything.
Sunken Eyes and Hollow Cheeks
Dark shading in the eye sockets and under the cheekbones does most of the work, and it’s the step that makes a face look tired instead of painted. Use a soft brush or sponge, build the colour slowly and stop when it looks like a long week and not a car crash.
Zombie Makeup Ideas You Can Do at Home
A few zombie makeup ideas that work without special effects: the office zombie with a lanyard, a tie and a thousand-yard stare, which is also most Mondays, the cracked-skin zombie, the bruised party zombie who clearly got lost on the way home, the tourist zombie with a camera and a sunburn and the retro zombie with faded colour and torn clothes. If you’d rather be bones than brains, the skeleton makeup look is another one that stays on the surface.
Zombie Makeup Designs: Cracks, Veins and Bruises
Zombie makeup designs add pattern on top of the shading: thin cracks painted with a fine brush, blue and purple veins that follow the face and bruises with a soft edge. Draw veins with a light touch, since dark thick lines look like a drawing, and keep cracks short and uneven, because real cracks never run in neat patterns.
Zombie Makeup Men: Male Zombie Looks
Zombie makeup men can wear every look above, and facial hair changes how you build them.
Zombie Makeup Men With Stubble
Stubble is a gift here, because it already looks like a few days without sleep. Shade the face around it, add dark hollows under the eyes and a pale tone at the temples, and let the stubble show through the colour at the jaw. A bit of dirt along the jawline makes it look lived in.
Zombie Makeup Men With a Beard
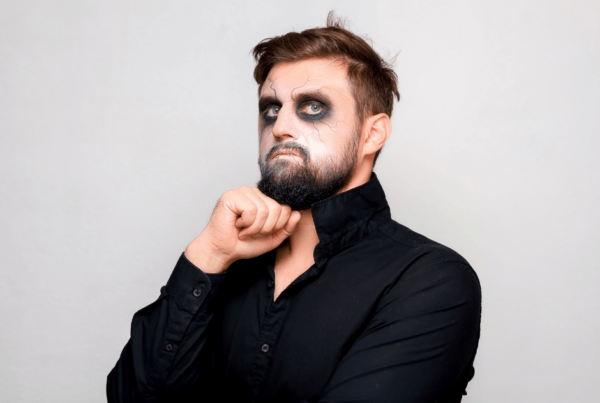
With a full beard, build the look on the forehead, the eyes and the cheekbones and keep the shading light around the whiskers, where colour clumps. A bruised eye, a pale forehead and a dishevelled collar are plenty, and a tattered shirt does the rest of the talking.
Male Zombie Wounds Are a Pro Job
Zombie bites on the neck and torn cheeks look great on a man with stubble or a beard, and they’re also the point where the look moves from surface makeup to built-up effects. If the plan includes wounds, the pro section below is the place to look.
Fake Blood: Where It Helps and Where It Doesn’t
Fake blood is the finishing touch that turns a grey face into a zombie, and it belongs in the DIY group when it sits on the surface and goes on last.
Surface Blood Is a DIY Job
Gel-style blood goes on last, in small amounts, with a brush or a fingertip, onto makeup that’s fully dry. Let it dry before you dress or hug anyone, and use less than you think, since a single trickle looks scarier than a whole chin of it. The blood tips in the vampire makeup post work for zombies too.
Where to Put It
Good spots are the corner of the mouth, one side of the neck and a small smear near a bruise, all places that don’t drag against a collar. Keep it away from the places hands and fabric rub, or it ends up on everyone you meet.
Keep It Off the Costume
Fake blood can stain light fabric, so wear dark clothes or a shirt you don’t mind losing, and check the label on the blood for stain warnings. Zombies never read the care label, but you should, and a spare dark top in your bag means a spill doesn’t end the night.
Special Effects Zombie Makeup: What Needs a Pro
Special effects zombie makeup is where the look is built on the skin and not painted onto it, and it’s the part to hand to a pro.
Zombie Makeup SFX Wounds: Built On, Not Painted On
SFX wounds are three-dimensional: torn skin, deep cuts, raised scars and exposed-looking tissue made with wax, latex or similar products. Fake wounds are the one place where looks painful is the review you want, and getting that look takes layering, shaping and blending that is hard to do on your own face in a mirror.
Why Pros Handle the Sticky Stuff
Products that stick to the skin or build up on it are harder to apply evenly and harder to remove, and the areas near the eyes, lips and hairline are the trickiest to get right. A makeup artist works with these products regularly, chooses what suits your look and finishes with a result that holds its shape for the night.
What a Local Makeup Artist Booked Through Blys Brings
For SFX looks, a local, professional makeup artist booked through Blys brings the right products to your home or event, applies the look and explains safe removal. Blys is a booking platform: you pick the service, a local artist accepts the booking and bookings run from 6 am to midnight, seven days a week. The artists are independent business owners, and if you want a ragged, torn-up hairstyle to match, a hair and makeup booking sorts the hair in the same visit.
What to Put in the Booking Notes
Say in the booking notes that it’s a Halloween zombie look, and say whether you want special effects (wounds, fake blood), so the makeup artist brings SFX products and allows extra time. Add the look you’ve seen, the time the event starts and where you’ll be getting ready.
What Extra Time Means
Special effects need more time than a surface look because wounds are built in layers and each layer needs to settle before the next one goes on. Plan the evening around that, and book the artist for well before you need to leave, so you can sit back and let the look finish properly.
Checking the Cost First
Mobile makeup artist costs are easy to check before you decide, and it helps to know the range before you send the request. Special effects usually take more of the artist’s time than surface makeup, so mention the wounds when you ask about price, and the quote will match the look you actually want.
Removing Zombie Makeup
Removing zombie makeup depends on what went on, and the surface looks and the SFX pieces come off in very different ways.
Easy Looks: Remove in Stages
For shading, bruises and surface blood, use the remover or method recommended on your products, and work in stages: blood first, then the colour, then the base. Wipe with a fresh cloth each time and take your time, because a slow wipe beats a hard scrub and keeps the colour from smearing into a clean patch.
SFX Pieces: Let the Artist Explain
Anything that was stuck on or built up needs a different approach, and the artist who applied it explains how it should come off. Don’t pull at anything that’s still stuck down, and if you’re not sure at any point, stop and ask the artist who did your look.
Making Zombie Makeup Last
Zombie makeup is forgiving, since a worn-in look suits the character, but the shading and blood still need setting. A light dusting of powder over the base and a quick check in the mirror once everything is dry is usually enough. The all-day makeup routine works as the prep under any look, and a small touch-up kit with the colours you used handles the rest.
Booking Zombie Makeup Through Blys
Easy zombie makeup is yours to do at home, and the special effects wounds are the part to book if you want them to look right and come off properly.
If you’ve picked your look, send Blys the details: the look and the time, plus the address and a note about any wounds or fake blood, so the artist turns up with the right products and plenty of time.
Arrange Your Zombie Makeup at Home →
Frequently Asked Questions
These questions come up when the party plan includes more than a bit of grey shading.
How far ahead should I book special effects zombie makeup?
Same-day bookings are possible subject to availability, though earlier is easier, especially in Halloween week. Special effects take longer than surface makeup, so setting a time a few days ahead gives your artist room to plan the extra time, and it means you aren’t squeezing a wound into the last half hour before the party.
What if I can’t tell whether my look is DIY or pro?
Use the surface rule: if it sits on top and wipes off, it’s DIY, and if it sticks to the skin or builds up, it’s a pro job. If you’re still unsure, share a reference photo in the booking notes and let the artist tell you which side it falls on.
Can I wear a wig or hair costume with zombie makeup?
Yes, and it’s worth planning the order: do the makeup first, then add the wig or hair piece, so the paint doesn’t smudge on the edge. Mention the hair in your booking notes so the artist can leave the hairline area free.
Can an artist do special effects on a man with a beard?
Often yes, and the artist can plan the look around the beard, or place wounds where there’s skin to work with. Mention the beard in your booking notes so the artist can bring the right products and allow the time.