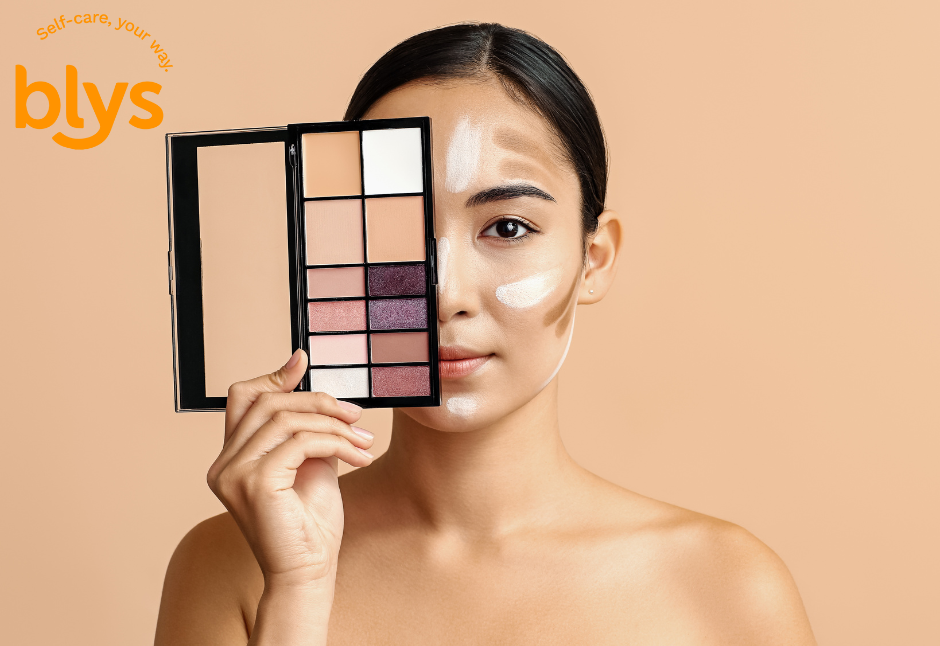
Contouring and highlighting are cornerstones of modern makeup, helping to define features, create balance, and add dimension to the face. From sharpening cheekbones to bringing light to the eyes, these techniques remain go-to methods for both everyday looks and special occasions.
Once reserved for backstage artists, sculpting is now accessible to everyone. Thanks to services like Blys’ at-home makeup, you can enjoy professional results without leaving your home, perfect for big events or when you simply want expert guidance tailored to your features.
This guide will walk you through everything you need to know: how to contour for your face shape, product picks for beginners, blending strategies for a natural finish, mistakes to avoid, and pro upgrades that take your look further.
By the end, you’ll have the tools and insights to sculpt confidently, whether you’re DIY-ing or booking a professional.
The Basics of Face Sculpting Makeup
Face sculpting works by using light and shadow to shape how your features appear. Contouring relies on darker shades to create definition, adding depth under the cheekbones, along the jawline, or at the temples for a slimmer or more structured look.
Highlighting does the opposite. By placing brightness on areas like the cheekbones, nose bridge, and brow bone, it lifts the face and creates a natural glow.
The key is balance. Heavy contour can look harsh, while too much highlight may appear shiny. Together, they enhance rather than overpower your natural features.
Research shows that the way light and shadow fall on a face changes how we interpret youthfulness and symmetry. That’s why blending and placement matter just as much as product choice. Mastering these basics sets the stage for a sculpted look that feels both polished and effortless.
Understanding Your Face Shape
One of the biggest secrets to successful contour and highlight is knowing your face shape. Each shape benefits from slightly different techniques, and once you understand yours, placement becomes much easier.
Oval
Often seen as the most balanced face shape. With soft proportions, you only need light contour along the cheekbones and a touch of highlight on the high points to enhance natural symmetry.
Round
Round faces have softer edges and equal width and length. Contour under the cheekbones and along the jawline helps create the illusion of length, while highlighting the centre of the face brings balance.
Square
Defined by a strong jaw and forehead, the aim here is to soften angles. Blend contour along the temples and jawline, while highlighting the cheeks and centre to keep the look fresh.
Heart-shaped
Wider at the forehead and narrower at the chin, this shape benefits from contouring the sides of the forehead and adding warmth under the cheekbones. Highlight the chin and under the eyes to balance proportions.
Long/Rectangular
Longer face shapes look best when contour is used to reduce vertical length. Apply contour at the hairline and chin, then highlight across the cheeks to add width and balance.
Even without a diagram, you can picture how shadow slims and highlight draws the eye forward. Think of contour as reshaping edges and highlight as bringing light to the centre—it’s all about guiding attention where you want it.
For those with oily skin, pairing sculpting with the right base is key check out our guide to makeup for oily skin for tips on achieving a lasting matte glow.
Product Selection for Beginners
For anyone new to face sculpting, the biggest challenge is often knowing which products to buy. The beauty market is full of powders, creams, sticks, and highlighters that all promise perfect results.
The good news is you don’t need a huge kit to get started just a few well-chosen items that suit your skin type and style. Here are the essentials to keep in mind:
- Contour types: Powders give a soft, buildable finish for oily or combination skin. Creams create a more natural, skin-like effect for dry or mature skin, while sticks are precise and portable but need careful blending.
- Highlight types: Matte gives subtle lift without shine, shimmer adds glow for evenings, and liquids or sticks create a dewy finish that blends easily.
- Tools: Brushes provide precision, especially with powders, while sponges are forgiving and help diffuse creams and liquids for a seamless result.
- Shade matching: Aim for contour shades just 1–2 tones darker than your skin and highlights 1–2 tones lighter.
- Beginner tips: Apply lightly and build slowly, check in natural light, and avoid heavy lines that look harsh.
Starting with these basics helps you build confidence without wasting money on products that don’t work for your skin. For extra guidance on shade-matching and pro application, you can always turn to Blys’ at-home makeup services and learn directly from a professional.
Highlighting Techniques That Work
Highlighting lifts and brightens the face by placing light on natural high points the cheekbones, brow bone, bridge of the nose, and cupid’s bow. These areas naturally catch light, so enhancing them creates a fresher and more defined look.
For daytime, keep it subtle with soft, finely milled products that blend into the skin. For evenings or events, choose luminous powders or liquids for a stronger glow, focusing on the cheekbones and brows for a sculpted effect.
Research shows that brightness in the face influences how youthful and healthy someone appears, with light reflection linked to vitality and symmetry. Even a light touch can make a big difference.
The key is moderation highlight should enhance, not overpower. Pair it with contour for balance, and always blend well. If you’d like to see these techniques in action, book an at-home makeup session with Blys and let a professional show you the perfect placement for your features.
Blending Like a Pro
Blending is what turns contour and highlight from obvious streaks into a seamless sculpted look. Without it, even the right products in the right places can appear harsh.
Step-by-step method:
- Apply contour and highlight in light layers rather than heavy swipes.
- Use a damp sponge for creams or liquids, dabbing (not dragging) to diffuse edges.
- With powders, choose a fluffy brush and blend in small circular motions.
- Always blend contour upward to lift the face, while softening highlight so it melts into the skin.
Common mistakes:
- Leaving harsh lines that break the illusion of natural depth.
- Using the wrong brush size or a dry sponge, which creates patchiness.
- Rushing the process instead of taking time to soften edges.
Light check
Makeup can look different under indoor vs outdoor light. After blending, step near a window or switch to warm indoor lighting to make sure the sculpting looks balanced in both settings.
Pro tip
For long-lasting results, layer products. Start with cream contour and highlight, blend thoroughly, then lightly set with powder products. This adds dimension and ensures your look stays intact for hours.
Blending is the make-or-break step in face sculpting makeup. With a little patience, your contour and highlight will look polished, natural, and event-ready.
If you want your contouring routine to align with eco-friendly choices, our piece on sustainable beauty practices shares simple swaps for hair and makeup.
Common Contour & Highlight Mistakes to Avoid
Learning to contour and highlight is a skill, and like any technique, mistakes are part of the process. The good news is most errors are easy to spot and even easier to fix once you know what to look for. Here are the most common slip-ups beginners make:
- Wrong shades: Choosing contour that’s too dark or the wrong undertone can leave the skin looking muddy instead of defined.
- Too much highlight: Heavy shimmer across the face can make skin look oily rather than radiant.
- Skipping setting: Cream contour and highlight won’t last if not locked in with powder for hold.
- Chasing trends: Extreme sculpting tricks online don’t always flatter your unique face shape.
By keeping these points in mind, you’ll avoid the frustration of makeup that looks heavy or unnatural. Focus on enhancing your natural features rather than copying every trend.
And if you’d like expert help fine-tuning your technique, Blys’ at-home makeup services make it easy to learn directly from professionals who can personalise sculpting to your face.
Pro Upgrades & Expert Techniques
Once you’re comfortable with the basics, advanced sculpting methods can take your look to the next level. These techniques are often used by professional artists to adapt makeup for different faces and occasions.
- Draping: Using blush to contour and lift, creating a softer finish.
- Reverse contour: Highlighting around darker areas to sharpen edges without adding heaviness.
- Non-touring: Skipping contour altogether and relying on highlight and dewy skin for natural definition.
Another pro move is layering creams with powders. Start with cream contour and highlight, then set with a light layer of powder products. Studies in cosmetic science note that layering textures improves both staying power and finish by locking pigment into place.
It’s also important to adjust for context: softer sculpting suits daily wear, while more defined lines and brighter highlights stand out in photography or evening light.
These upgrades prove that sculpting isn’t one-size-fits-all it’s about refining your technique to fit the moment. For tailored advice, Blys’ at-home makeup services give you access to artists who can demonstrate these methods and adapt them to your features.
Wrapping Up
Sculpting makeup isn’t about hiding your features it’s about enhancing what’s already there. With the right balance of contour and highlight, you can bring definition, light, and harmony to your face in a way that feels natural and polished.
Experimenting with different products and techniques will help you discover what works best for your skin type, undertone, and face shape. Some days a quick soft sculpt might be all you need, while other times you may want a bolder look that lasts through an event. The beauty of contour and highlight lies in this flexibility.
That said, there are moments when professional guidance makes all the difference. A trained makeup artist can not only apply these techniques with precision but also show you how to adapt them to your own routine.
Ready to take your sculpting to the next level? Book your at-home makeup session with Blys and enjoy expert results delivered straight to your door.


